
Add Station to Shoutcast Directory (3 Easy Steps)
When it comes to running an online radio station, or even a terrestrial station for that matter, one of the main goals is to have listeners at scale tune in to your station to enjoy the content you are broadcasting. Many successful online radio stations depend on having directories relay their broadcast as a means to have listeners discover and tune in with ease. Shoutcast, being one of the early adopters in the online radio station space since the early 90s, has long hosted an online radio station directory open to the public. This means anyone with an online radio can have their stream relayed here, and any listener from around the world can freely browse and tune in to their station of choice.
Shoutcast v2 now requires you to create an ‘Authorization Key’ (Authhash) for your stream so that it can be registered for the Shoutcast directories and as a Public stream. If a stream’s Authhash settings are not completed a server will act as Private until it is registered. If you want your station to be publicly available, then you will need an authorization key. Please note this is not required for private stations.
This guide explains how to configure the Shoutcast v2 “Authhash” settings in order to have your online radio station listed in the public Shoutcast directory.
Here’s how…
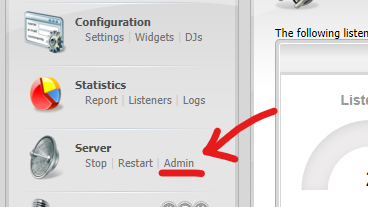
Step 1 – Login to Centova Cast
In order to create your ‘Authorization Key’ (Authhash), first, click access your streaming server index page from your Quick Links in Centova Cast, which will take you to the SHOUTcast Stream Status page.
Step 2 – Login to the SHOUTcast Server Panel
Click on Server Login found on the top right corner of the SHOUTcast Stream Status Page.
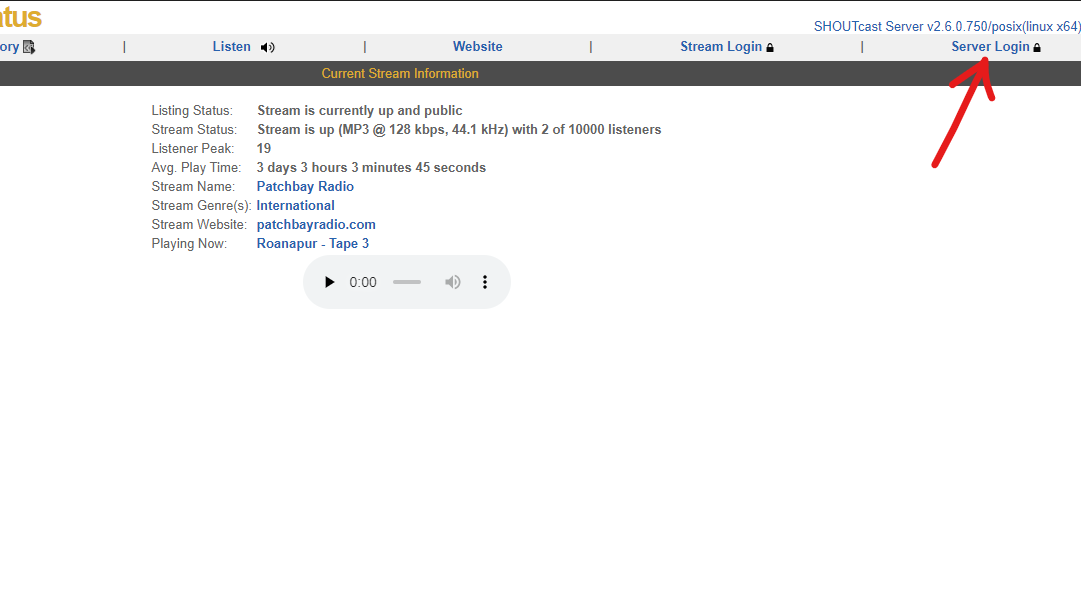
Note, The username for this login is Admin and the password will be the same as your Centova Cast administrator password.
Step 3 – Create the Authhash
Once logged in you next need to click the ‘Create Authhash’ link.
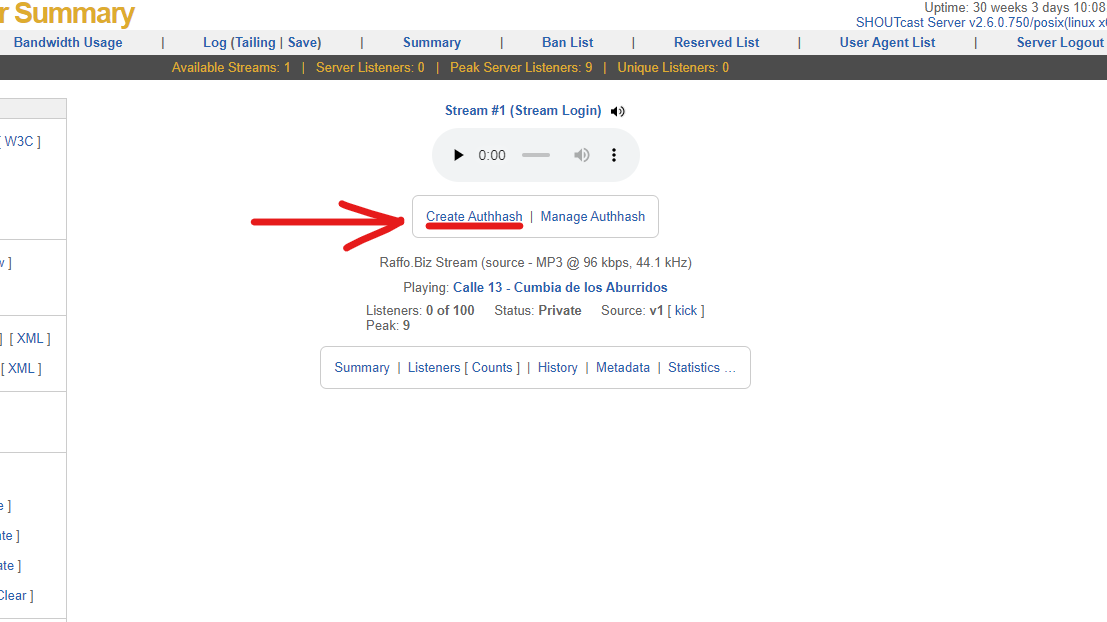
You are then taken to a page for you to complete your Shoutcast v2 servers ‘Authhash’ settings.
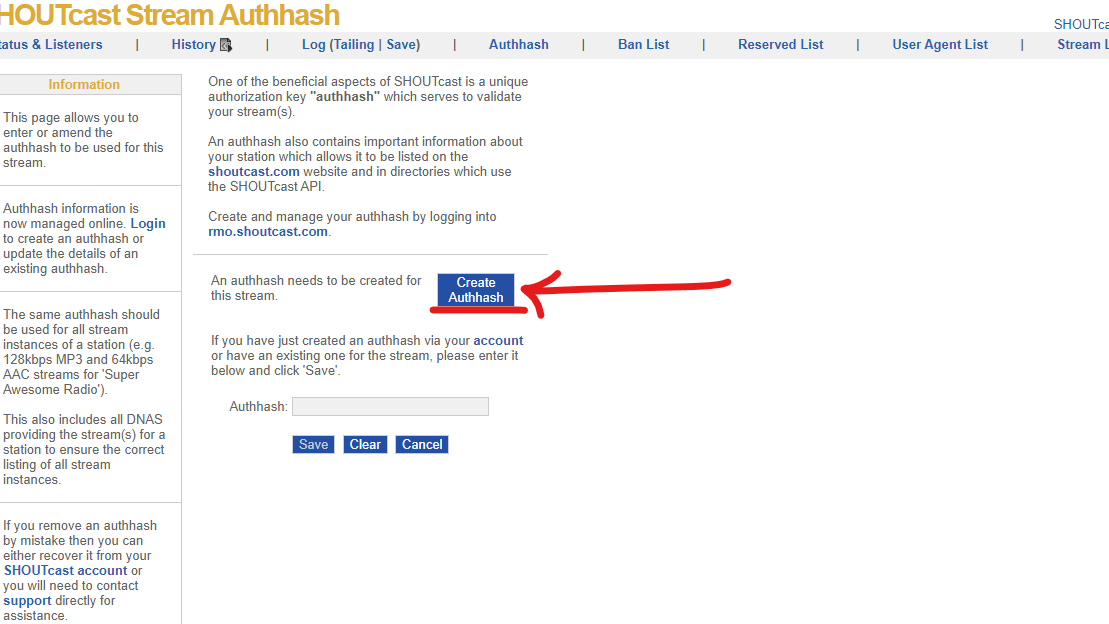
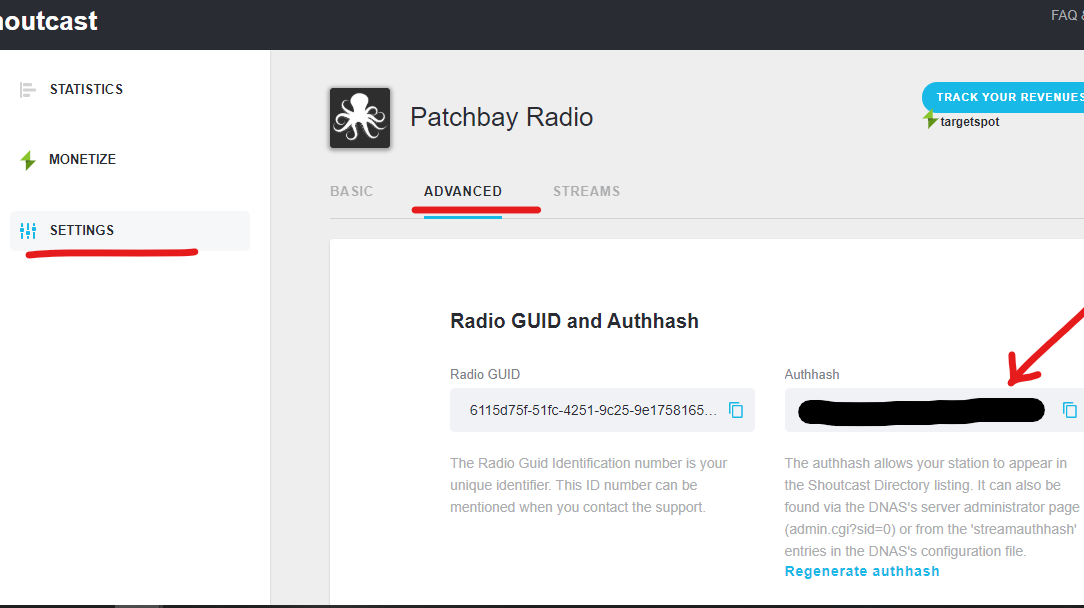
After clicking the Create Authhash button, you will be redirected to https://radiomanager.shoutcast.com. You will need to create a free shoutcast account if you haven’t done so yet and copy the newly generated authhash for your station in the Advanced section of your Settings.
Return to your SHOUTcast server Authhash configuration page and paste the authhash you copied from your SHOUTcast account into the Authhash section as seen below.
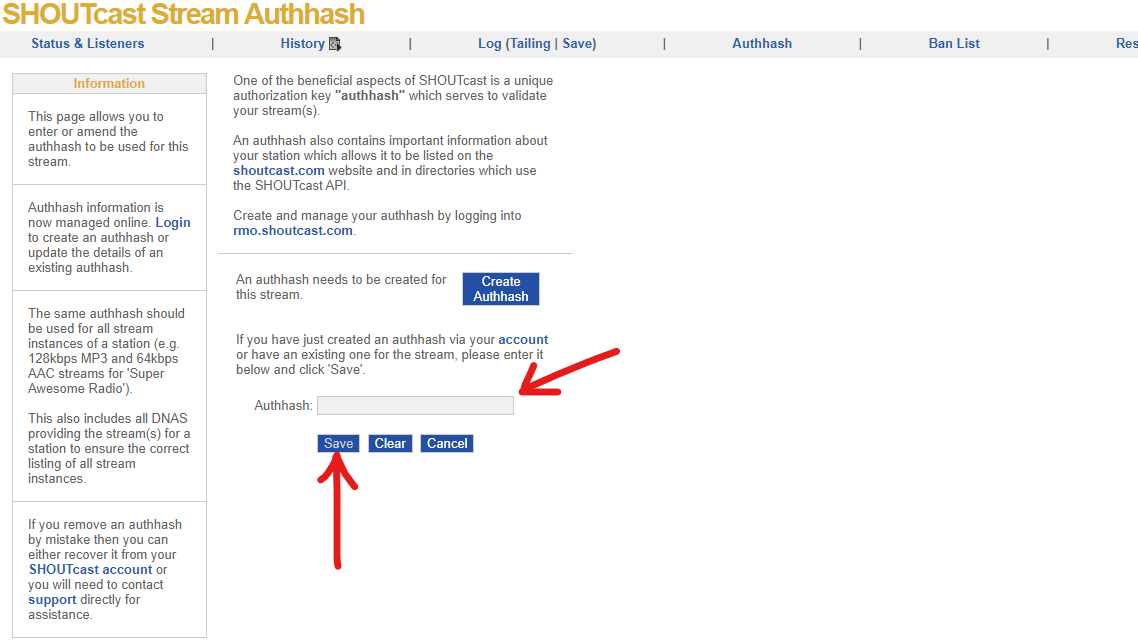
Once Authhash has been pasted, finally, click on the Save button and your server will then be registered with Shoutcast (which only usually takes a few seconds) and then become a ‘Public’ server available on the Shoutcast directory.
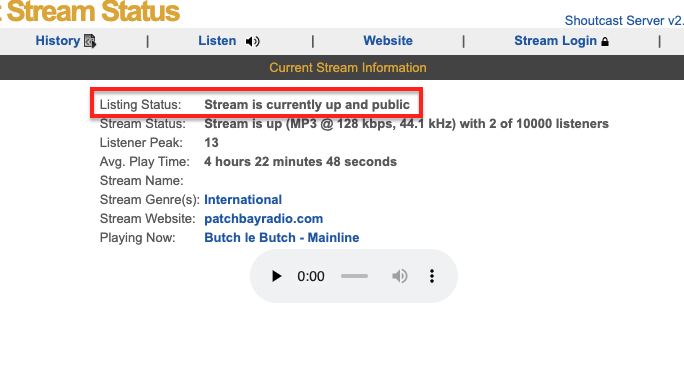
There you have it! If you followed the steps correctly from above, your online radio station should now be listed in the Shoutcast directories.
Whether you are starting a new online radio station or have an established one in place, here at Aloncast we offer some amazing online radio plans that are both affordable and highly reliable. We also offer a generous free plan with the option to choose between two control panels (Everest Cast or Centova Cast) and your choice of streaming software (Shoutcast or Icecast). Go check out our website and compare the plans, and do let us know if you have any further questions!
Wonderful, very good message
There is something about that, and I think it’s a good idea.